As much as you want to share you content with the world, you also need to make sure that your website and your resources are not being abused.
Here’s how…
People who are familiar with WordPress know that the current default directory for items uploaded to a WordPress website (e.g. images, documents, and PDF files) is “www.YourWebsite.com/wp-content/uploads”. And some of those people want to freely download all of your resources from that directory as well. This includes files that you want people to find when they normally navigate your site, but it ALSO includes files that you exclusively use behind-the-scenes, or worse, files that you have uploaded that are only intended for paying customers.
I’d like to call these mal-intentioned surfers “hackers,” but all they are really doing is typing that URL above into their Web browser and navigating directly to your folder. Then, they get a basic listing of all the files in that directory making it easy to download whatever they want whether or not you intended it for public access.
What you also want to avoid is people not only taking all your files, but also people who are direct linking to those files. This is the equivalent of stealing your bandwidth, which can slow down your site and potentially cause some red flags with your Web host.
Note: The method below does not protect your files from being accessed, it just prevents people from perusing entire directories.
Simple Fix
There is a simple fix for this. Ultimately, this can be resolved by changing a few settings in your Web hosts control panel.
Many Web hosts have a default setting for Web directories that do not have a Web page assigned to them. This default is often called “Fancy Indexing.” All this does is create a basic, dynamic HTML page for a directory with files in it and presents them in list fashion. All you need to do is choose the directory you want to protect from this feature by choosing “No Indexing” or some equivalent to that depending on your Web host.
Note: If you are not comfortable accessing your Web hosts control panel (cPanel, hsphere, etc.) and changing settings, many great Web hosting companies such as the one I use, Bluehost.com, will be more than happy to help you set this up or just do it for you if you know which directories you’d like to protect.
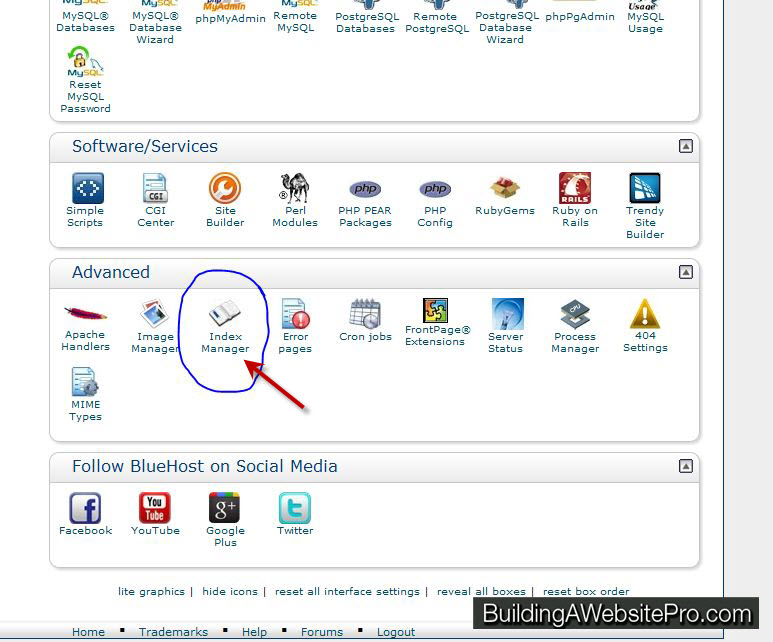
Sign into your Web hosting account, and click on your cPanel. At the very bottom, go into the “Index Manager.”
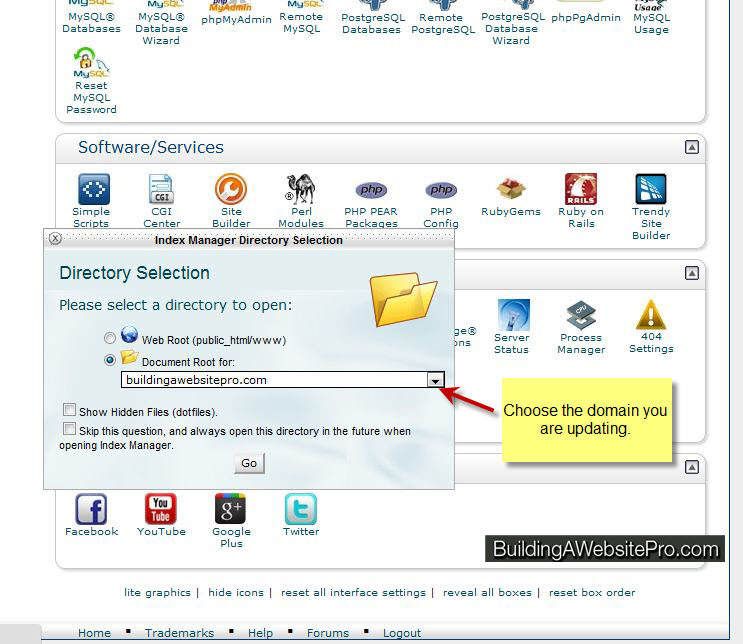
Choose Your Domain with a folder you want to protect.
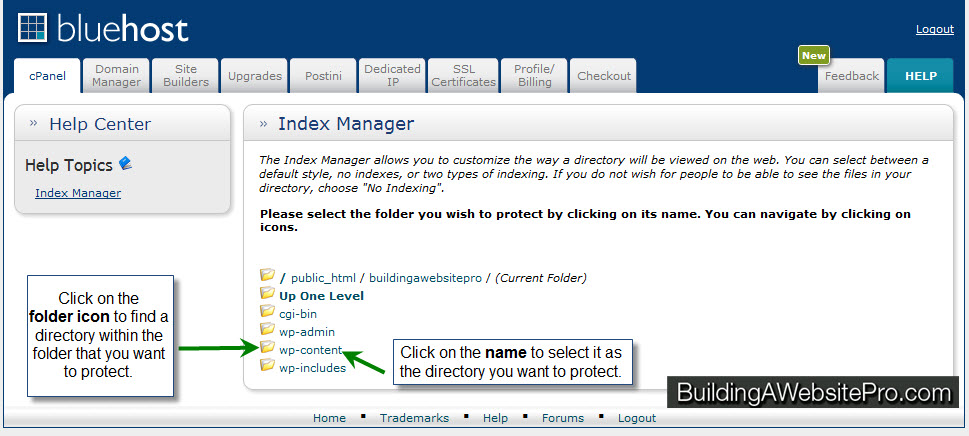
Navigate to your folder.
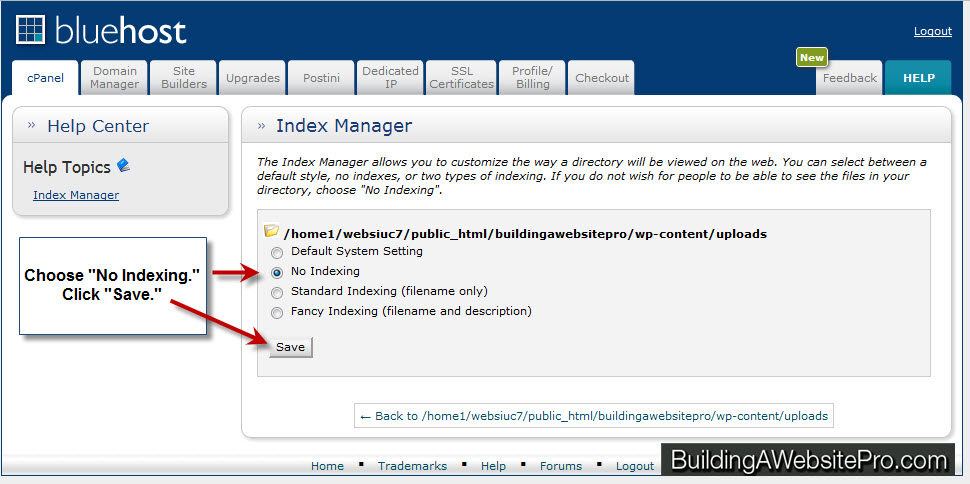
Select “No Indexing” for your chosen directory and click save.
That’s it!
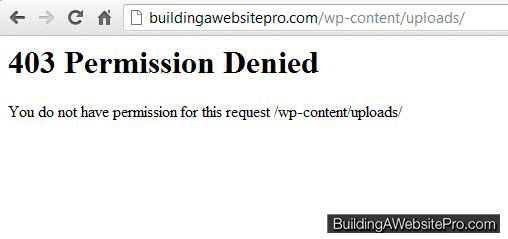
Now, when someone tries to access the folder directly, it will give them an error page such as this one:
Congratulations! You just helped to protect your WordPress uploads!

